Tg Develop's W Okada Fork Cloud
Last update: June 26, 2026
Introduction
- This is a cloud-based alternative to run Wokada Tg-Develop's Fork, for users without a powerful local PC GPU, via Google Colab, Kaggle, or Lightning.AI.
Server Audio not available
"Server audio not available" is normal on cloud platforms as they have no physical sound card. Always use Client mode for audio input/output.
Virtual Audio Cable
A Virtual Audio Cable (VAC) is required to use the realtime voice changer on Discord & Games.
-
A VAC makes a virtual audio device, used to re-route audio between programs.
-
In this context, it allows you to set the AI Converted Voice Output as your input device in programs like Discord.
For Windows
Download VAC Lite (Virtual-Audio-Cable by Muzychenko).
-
Run
setup64if you are on a standard PC (Intel/AMD). -
Run
setup64aif you are on an ARM-based Windows Laptop (e.g., Snapdragon CPUs). -
After installation, it may change your default audio system. Click Yes when asked to open audio settings (or press WIN+R and type "mmsys.cpl"). Change your Recording and Playback devices back to your preferred default devices, and ensure they are also set as "Default Communication Devices."
For Mac
Download either: Blackhole Virtual Audio Cable or VB-Audio
For Linux
- Debian/Ubuntu:
sudo apt-get update && sudo apt-get install -y portaudio19-dev - Fedora/RHEL:
sudo yum install -y portaudio - Arch:
sudo pacman -Syu portaudio
Choose your Cloud Service
Set up the program using your preferred cloud service guide. Once configured, use the Public Tunnel URL to open the interface and continue with the next steps
Google Colab Web UI
Decent performance and easiest setup for standard use.
Kaggle
Generous free GPU quotas. Great alternative if Google Colab is limited.
Lightning.AI
Persistent storage and powerful GPUs.
Google Colab
Google Colab Service
Check the Google Colab Glossary for more info on Free Tier, Limits, Verification, Pricing and other things.
Disallowed Activities: Running Web UIs on the Google Colab Free Tier is a violation of Google's Terms of Service. Please be aware that Google’s detection systems operate mid-run, not just at startup; even if you bypass the initial "Disallowed Code" check through encryption, your session remains at risk. Persistent violations can lead to a progressive penalty: starting with reduced GPU availability and potentially escalating to a permanent restriction of your Google account's ability to execute Colab notebooks. See Google's official policy for more information.
Paid
You need the Google Colab Paid Tier to run this, as it uses a Web UI; otherwise, you could risk getting disconnected or banned.
-
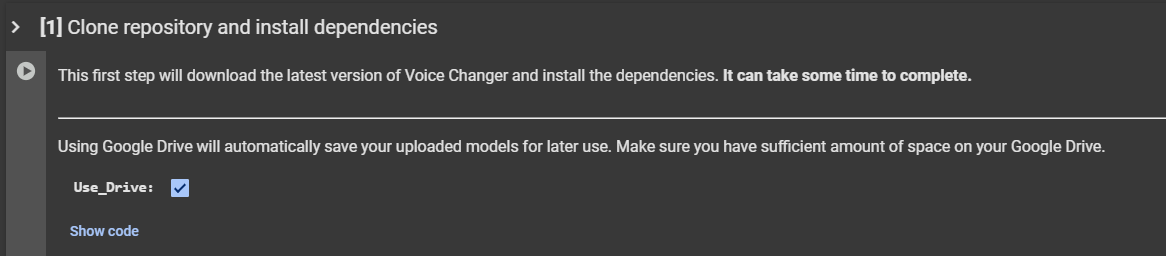
1. Access: Go to the Tg-Develop Colab.
-
2. Install: Start from the top and run the first cell.
-
3. Second Cell: When it finishes (it will output
Done! Proceed with the next steps), run the second cell.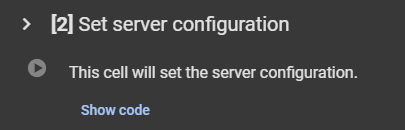
-
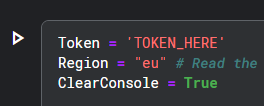
4. Ngrok: Scroll to the last cell, place your Ngrok token in the
TOKEN_HEREfield.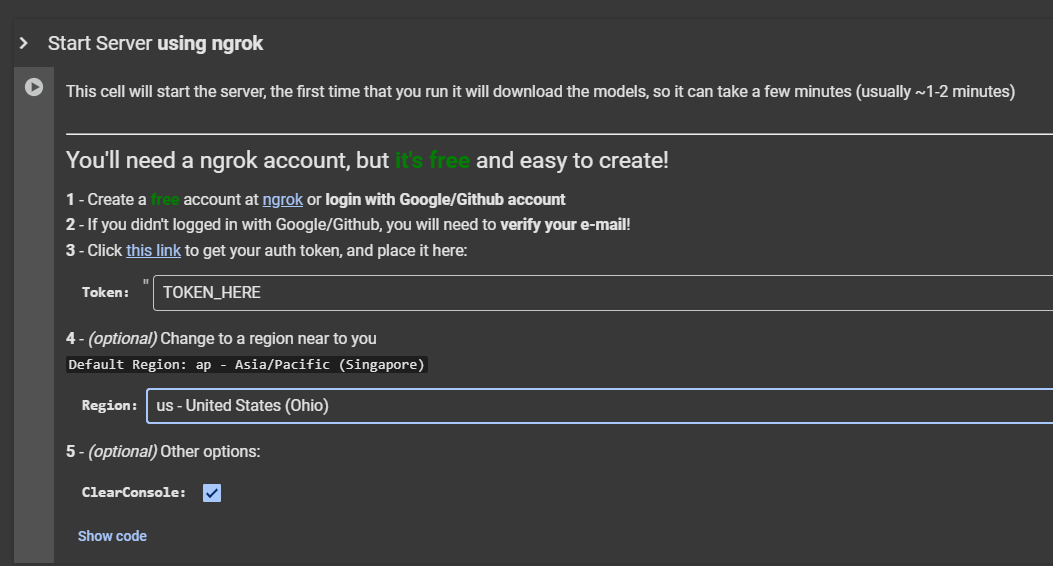
-
5. Launch: Run the cell. (Optional) Under the token field, you can change the region selection for lower latency. Once it finishes downloading, click the generated Ngrok link to start the Web UI.
Kaggle
Kaggle Service
Check the Kaggle Glossary for more info on Free Tier, Limits, Verification, Pricing and other things.
Account Setup
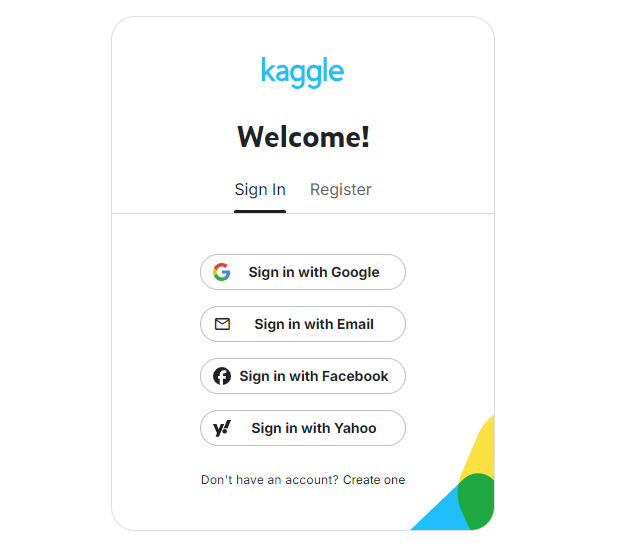
- Start by making an account here.
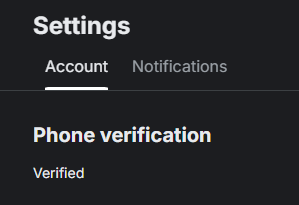
- Verify your account with a phone number. This is required to enable the "Internet" option in your notebooks, which is necessary for downloading models and dependencies.
Notebook Creation & Setup
-
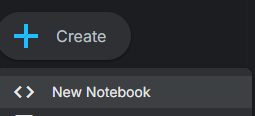
Create: Go to Kaggle and click Create then New Notebook at the top left.
-
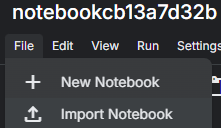
Import: Under your session's name click File then Import Notebook.
-
Link: In the new window, click the Link tab and paste the following URL:
https://github.com/tg-develop/voice-changer/blob/master-custom/Kaggle_RealtimeVoiceChanger.ipynb. Click Import.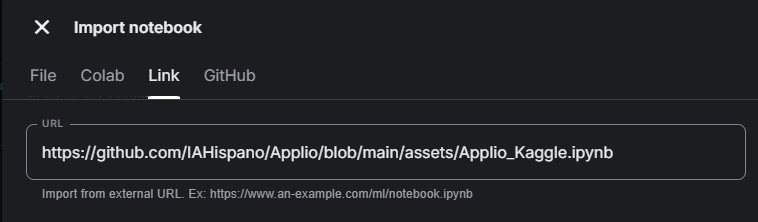
-
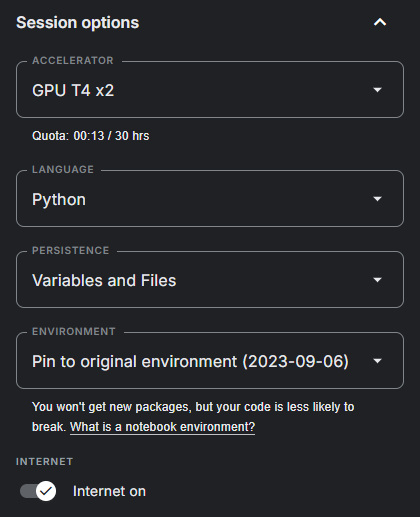
Settings: In the sidebar on the right, turn on the Internet switch. Make sure persistence is set to Files and variables.
-
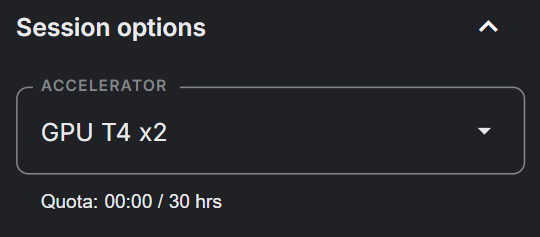
GPU: Turn on T4 x2 GPUs in the Accelerator settings.
-
Save: (Optional) Turn on "Save version" to save your progress.
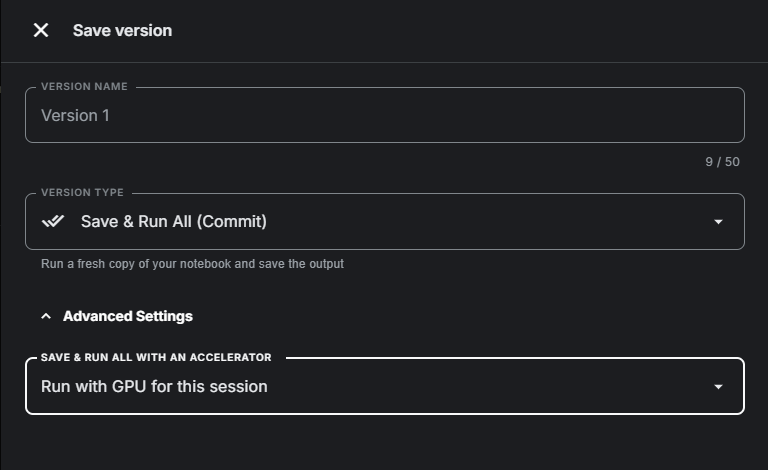
Your runtime will continue draining when you're not running any cells with this option on.
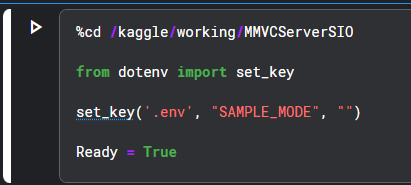
Installation & Tunnels
-
Install: Starting from the top, run the first installation cell. When it outputs
Done! Proceed with the next steps, run the third cell.
-
Ngrok: Put your token in the last cell.
Lightning.AI
Lightning.AI Service
Check the Lightning.AI Glossary for more info on Free Tier, Limits, Verification, Pricing and other things.
Create an Account
- First, make an account with Lightning Ai.
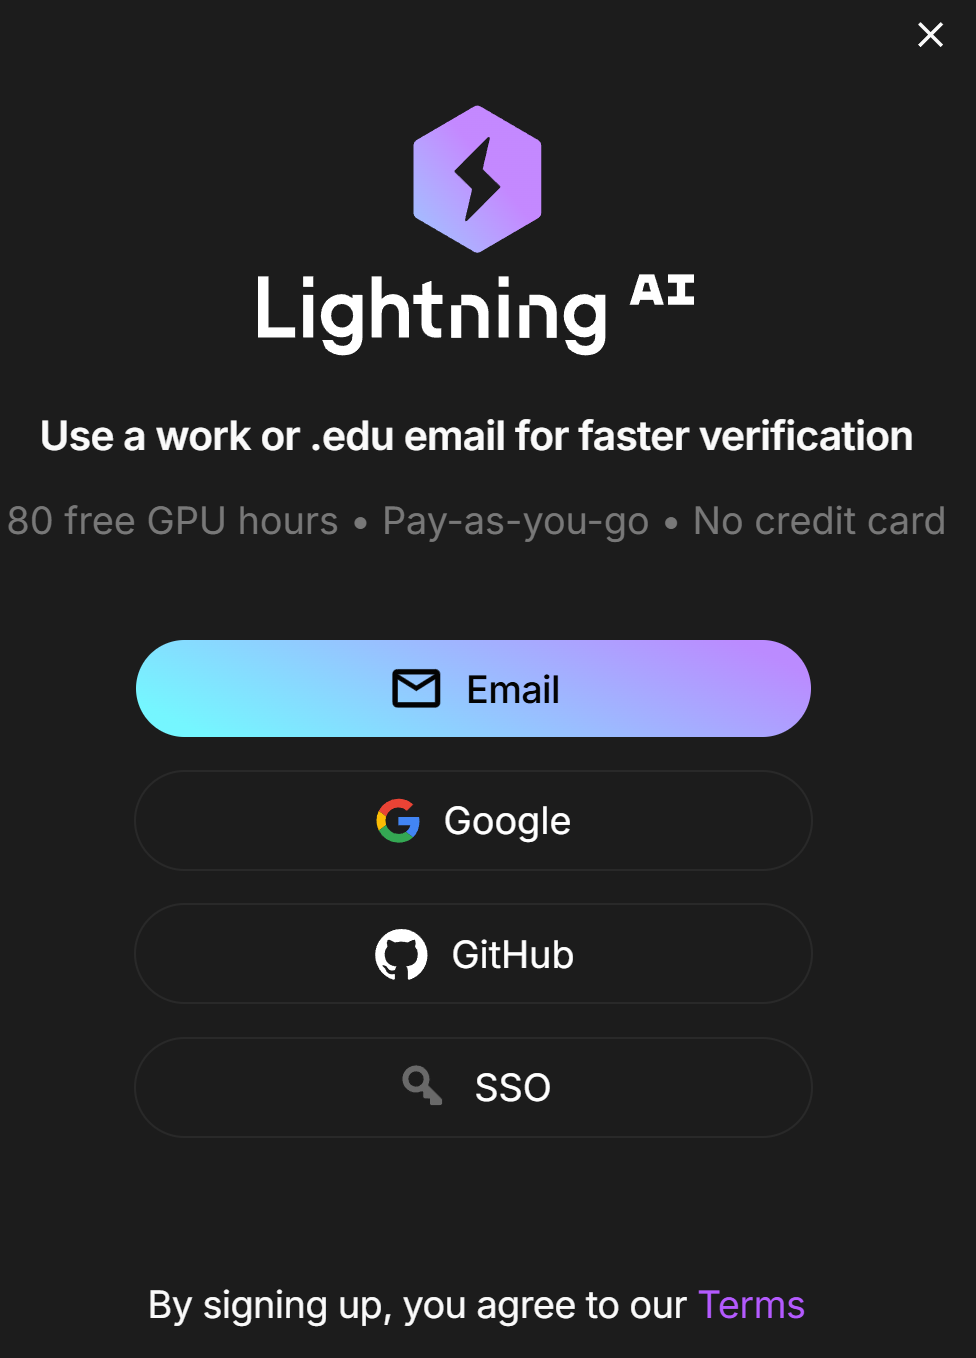
- Make sure you verify yourself with a phone number. Once you've done that you will get an email that looks like this:
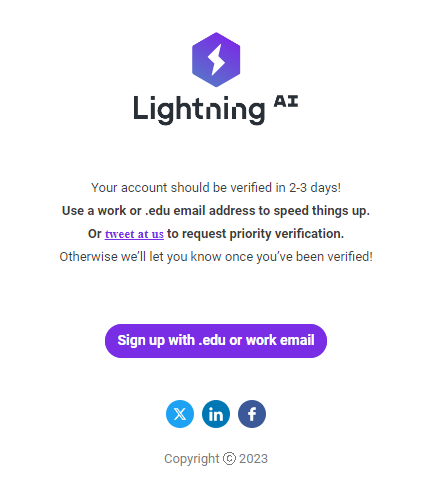
Verification Time
You will need to wait 2-3 business days to become fully verified.
- Studio: Clone the Wokada-TgDevelop-Fork Studio.

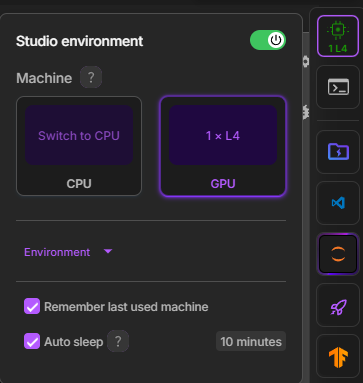
- GPU: Switch to a GPU environment (Studio Environment -> Switch To GPU).
-
Install: Run the first cell to install, run the second cell to configure.
-
Tunnels: In the third cell, choose your tunnel (Port Viewer recommended) and run it. Use the provided file drive to upload models and TensorBoard to monitor training.
-
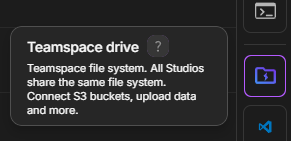
File Management: Use the Teamspace Drive button on the right sidebar to upload files.
-
Maintenance: If you need to update the Program or start fresh, you can run the final cell in the notebook, "Delete everything". This will remove all downloaded files and configurations from your persistent storage, allowing for a clean installation by re-following the notebook with perhaps a changed branch variable.
Usage
Now that you have the Web UI running, the rest of the process is identical to using a local installation.
Troubleshooting
The web interface (client) is just a control panel; the actual voice conversion and backend processes happen on the server. If the cloud server crashes or fails to launch properly, you can enable Debug Mode to read the exact error logs directly in your notebook's output cell.
To do this, you need to append the --log-level debug argument to the command that launches the server.
- Scroll to the bottom of your notebook to find the cell that starts the server.
- Look for the execution command:
!./ML_Program - Add the debug flag to the end of the command so it looks like this:
!./ML_Program --log-level debug- Run the cell again.
- Locate the final cell in your notebook/studio that actually starts the server.
- Look for the execution command:
!./VoiceChanger - Add the debug flag to the end of the command so it looks like this:
!./VoiceChanger --log-level debug- Run the cell again.
The notebook output cell will now print detailed debug logs. If the server crashes, copy the text output from that cell. Save it to a .txt file, or paste it to a site like Pastebin to share with others when asking for support.
Other Log Levels
By default, the server runs on the info log level. While the server also supports warning, error, and critical levels, you should avoid using them for troubleshooting. They filter out background information, hiding the context developers need to figure out why your server crashed.
- This utility allows you to convert model weights both ways: PyTorch (
.pth) to Safetensors (.safetensors), and Safetensors (.safetensors) back to PyTorch (.pth). - Safetensors ➜ PyTorch: W-Okada saves imported models internally as
.safetensorsfiles inside yourmodel_dirfolder. If you accidentally deleted your original.pthfiles, you can use this script to recover them. - PyTorch ➜ Safetensors: You can also convert standard
.pthweights to.safetensorsfor safer sharing, faster loading, or local archiving.
Secure & Clean
This converter is standard, lightweight boilerplate using PyTorch and Hugging Face APIs [1]. It features basic error handling and utilizes weights_only=True to safely load weights without executing arbitrary code.
Step 1: Install Requirements
- You must have Python installed on your PC.
- Open your terminal or command prompt (cmd) and run:
pip install torch safetensors
- For Notebooks (Google Colab & Kaggle): Run this command inside a new code cell:
!pip install torch safetensors - For Studios (Lightning.AI): Open a new terminal tab and run:
pip install torch safetensors
Step 2: Create the Script
- Create a file named
safetensors-pytorch-converter.pyand paste the code below into it. -
(For Google Colab & Kaggle, you can automatically create this file by running a new code cell with
%%writefile safetensors-pytorch-converter.pyas the very first line, followed by the script below).# RVC Model Weight Converter (PTH <-> Safetensors) import argparse import os import sys import torch from safetensors.torch import load_file, save_file def convert_pth_to_safetensors(pth_path, output_path): # Loads a PyTorch .pth model and exports its state_dict to Safetensors print(f"Reading PyTorch weights from: {pth_path}") try: # weights_only=True prevents execution of arbitrary code during load weights = torch.load(pth_path, map_location="cpu", weights_only=True) # Unpack the state_dict if the file contains training metadata if isinstance(weights, dict) and "state_dict" in weights: weights = weights["state_dict"] print(f"Writing Safetensors weights to: {output_path}") save_file(weights, output_path) print("Conversion successful.") except Exception as e: print(f"Error during PTH conversion: {e}", file=sys.stderr) def convert_safetensors_to_pth(safetensors_path, output_path): # Loads a Safetensors model and exports it as a PyTorch .pth file print(f"Reading Safetensors weights from: {safetensors_path}") try: weights = load_file(safetensors_path, device="cpu") print(f"Writing PyTorch weights to: {output_path}") torch.save(weights, output_path) print("Conversion successful.") except Exception as e: print(f"Error during Safetensors conversion: {e}", file=sys.stderr) def main(): parser = argparse.ArgumentParser( description="Convert RVC weights between PyTorch (.pth) and Safetensors formats." ) parser.add_argument( "input_file", type=str, help="Path to the .pth or .safetensors file to convert" ) parser.add_argument( "-o", "--output", type=str, default=None, help="Optional custom output path" ) args = parser.parse_args() input_path = args.input_file if not os.path.exists(input_path): print(f"Error: The file '{input_path}' does not exist.", file=sys.stderr) sys.exit(1) file_name, file_ext = os.path.splitext(input_path) ext = file_ext.lower() if ext == ".pth": output_path = args.output if args.output else f"{file_name}.safetensors" convert_pth_to_safetensors(input_path, output_path) elif ext == ".safetensors": output_path = args.output if args.output else f"{file_name}.pth" convert_safetensors_to_pth(input_path, output_path) else: print("Error: Input file must be a .pth or .safetensors file.", file=sys.stderr) sys.exit(1) if __name__ == "__main__": main()
Step 3: Run the Script
- Place your target file (
.safetensorsor.pth) in the same folder assafetensors-pytorch-converter.py. - Open your command prompt (cmd) or terminal in that folder.
-
Run the script by passing your filename:
To convert Safetensors to PyTorch (.pth):
python safetensors-pytorch-converter.py "model.safetensors"To convert PyTorch (.pth) to Safetensors:
python safetensors-pytorch-converter.py "model.pth"
- Find the path to your target file (
.safetensorsor.pth) in your cloud workspace or notebook file manager. - Execute the conversion:
- For Notebooks (Google Colab & Kaggle): Run the script using
!pythonin a new code cell:!python safetensors-pytorch-converter.py "/path/to/model.safetensors" - For Studios (Lightning.AI): Open your Lightning Studio terminal and run:
python safetensors-pytorch-converter.py "/path/to/model.safetensors"
- For Notebooks (Google Colab & Kaggle): Run the script using
General Troubleshooting
Because the web interface and core server function the exact same way, most common errorsare identical to the local version.